Work the model
The workspace
Find your way around the model — nav, scenario bar, top bar, Inspector, and the agent bar.
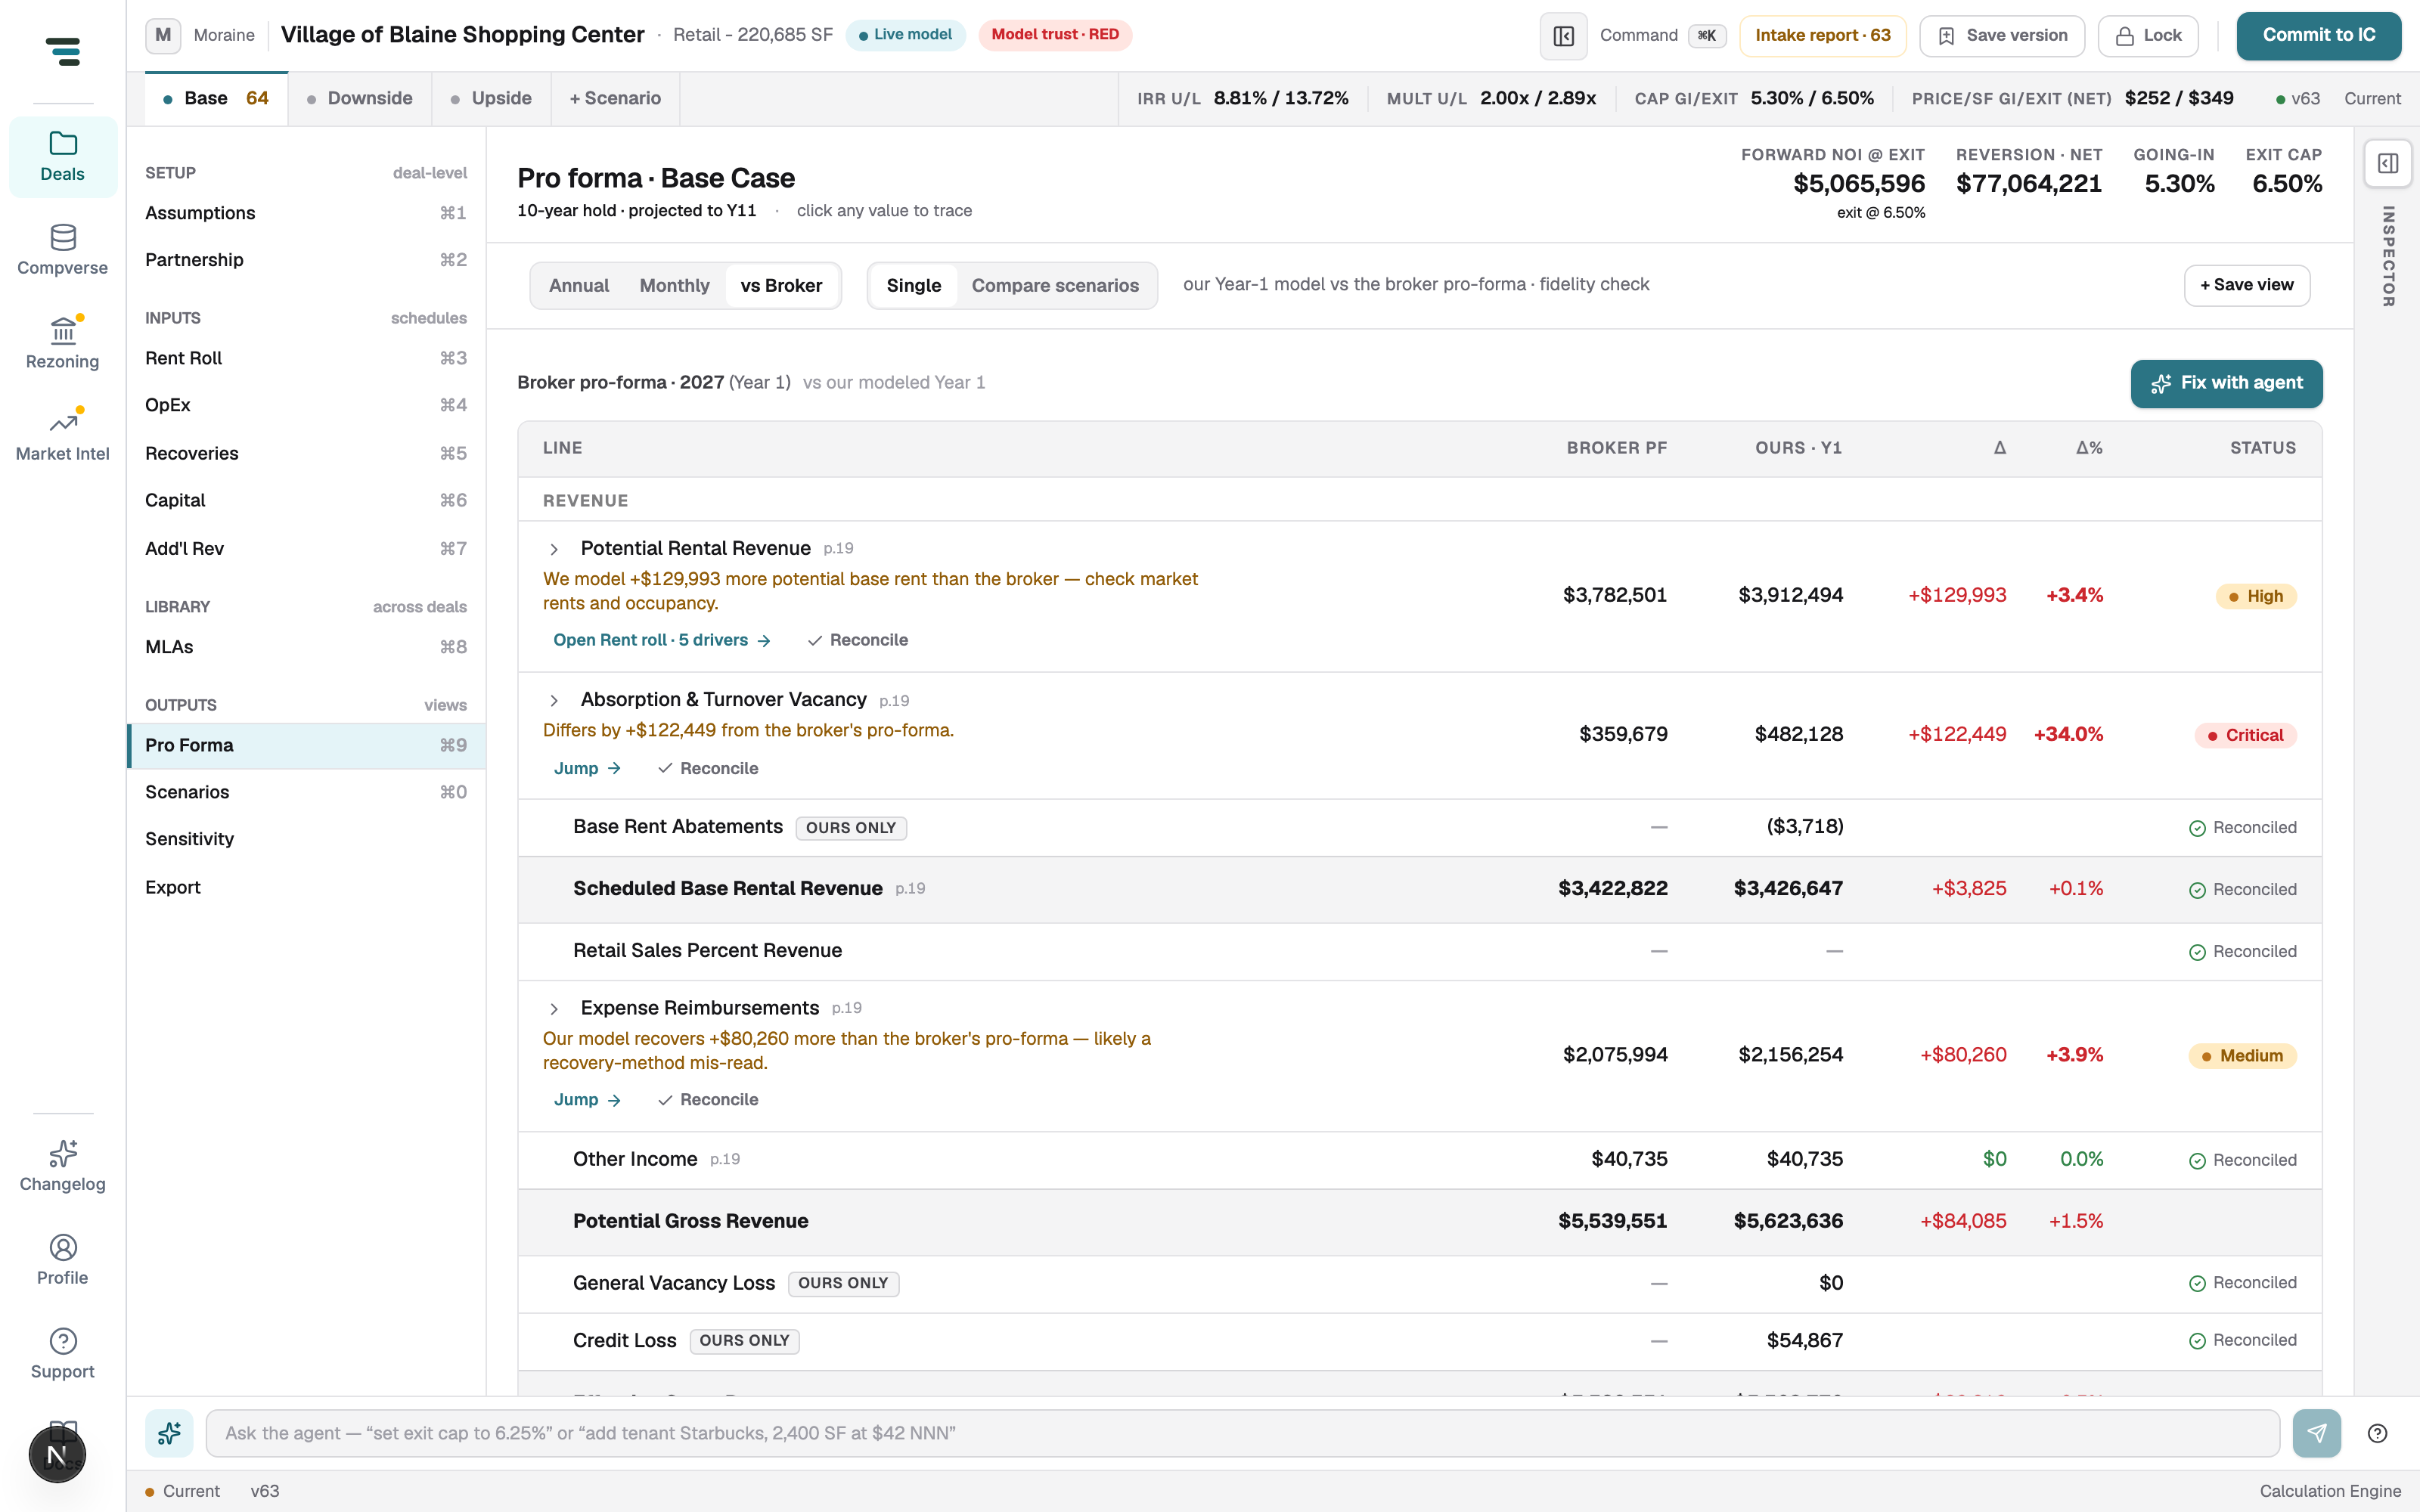
Open any built model and you get the same frame: navigation left, worksheet center, Inspector right, agent bar below, status bar at the foot.
Left nav — the whole model
Section titled “Left nav — the whole model”Four groups, one keystroke each:
| Group | Views |
|---|---|
| Setup (deal-level) | Assumptions ⌘1 · Partnership ⌘2 |
| Inputs (schedules) | Rent Roll ⌘3 · OpEx ⌘4 · Recoveries ⌘5 · Capital ⌘6 · Add’l Rev ⌘7 |
| Library (across deals) | MLAs ⌘8 |
| Outputs (views) | Pro Forma ⌘9 · Scenarios ⌘0 · Sensitivity · Export |
Top bar
Section titled “Top bar”Property name and live-model badge, then the working controls: the Model trust chip (RED/AMBER/GREEN — click it to open the Inspector), Command ⌘K, Intake report · N (the open-item count), Save version, Lock, and Commit to IC.
Scenario bar
Section titled “Scenario bar”Scenario tabs (Base, Downside, Upside, + Scenario — a badge on a tab is its open-warning count) and the headline metrics: IRR and multiple (unlevered/levered), going-in and exit cap, price per SF. They recalculate on every edit — this is where you feel a change land. The right end shows the version chip (e.g. v63 · Current).
Command Center
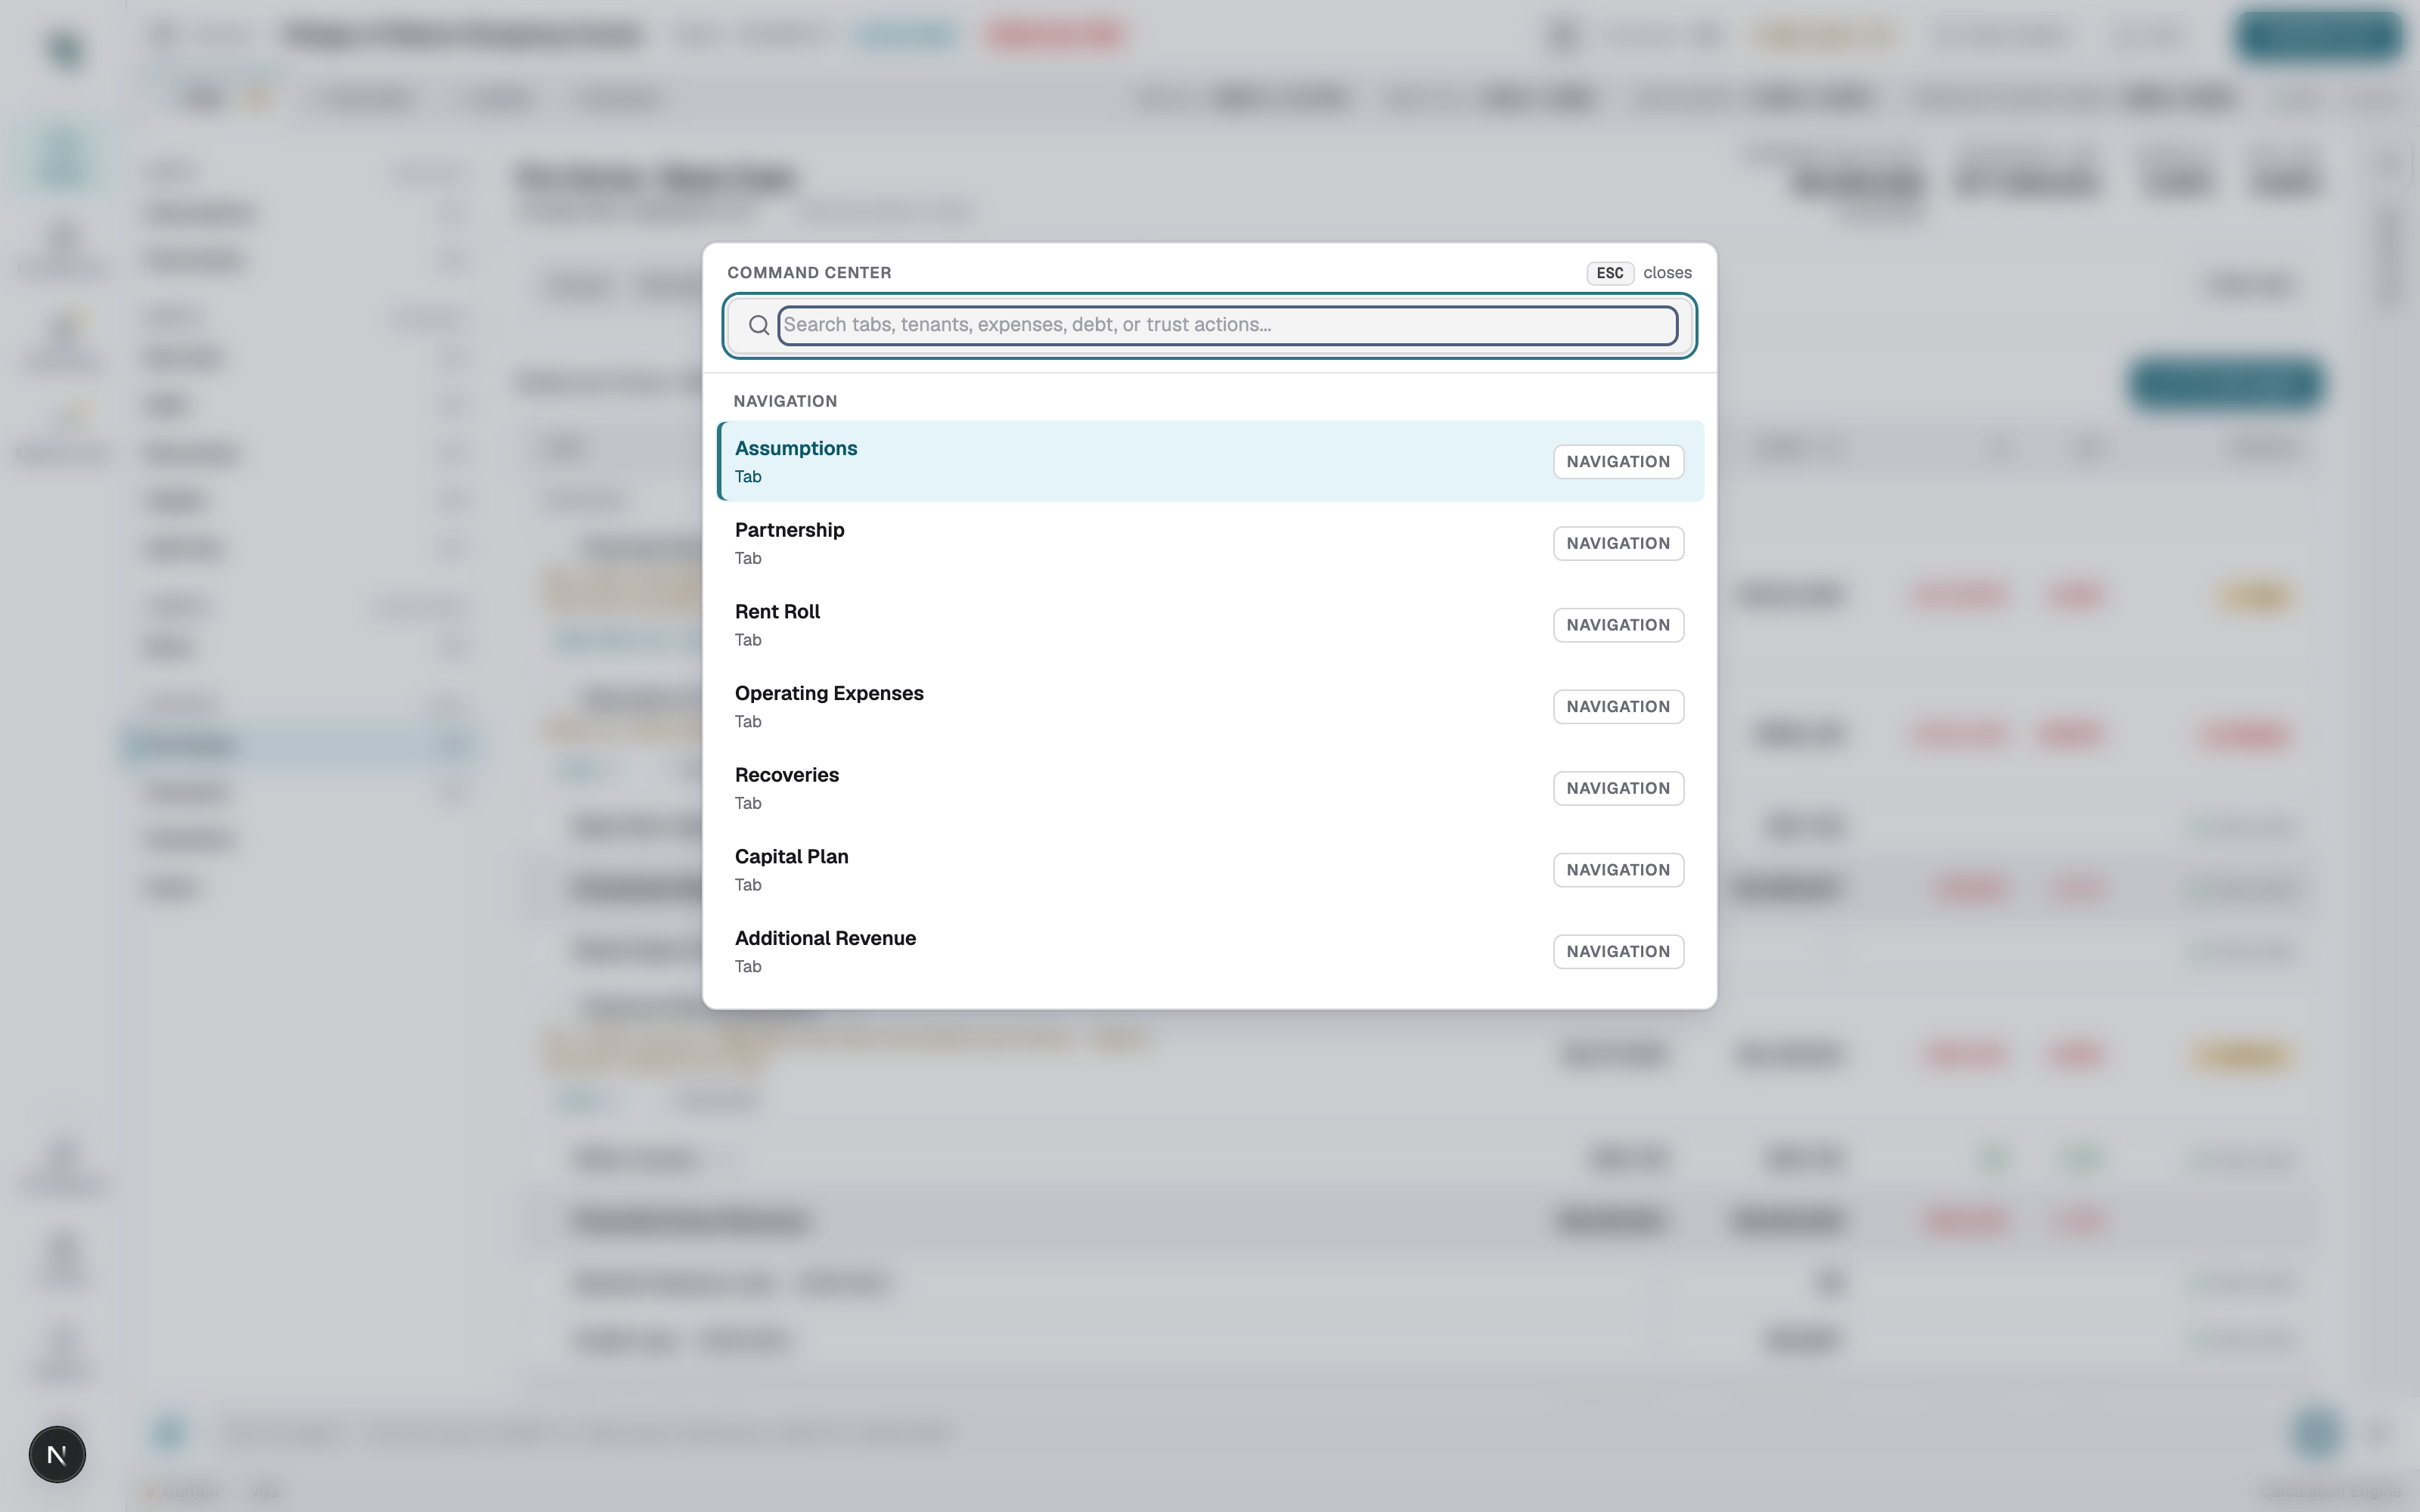
Section titled “Command Center”⌘K searches everything — views, tenants, expense lines, debt, trust actions. Fastest way to Sensitivity and Export, which have no digit shortcut.
Inspector and agent bar
Section titled “Inspector and agent bar”The right rail is the Inspector — click any worksheet value and it opens on that number’s math, source, and impact. See Inspect & review.
The bar at the bottom is the modeling agent — plain-language edits like “set exit cap to 6.25%”. See Edit the model.